The Faculty Annual Achievement Report and the Faculty Annual Evaluation Report available for download from the Annual Evaluations website, as well as the Outside Activity Request Form posted on the Conflict of Interest website, are dynamic PDF forms that require the use of Adobe Acrobat Reader to complete. Before working with a PDF form, please make sure that your computer has a recent version of Adobe Reader installed. (The latest version of the software is called Acrobat Reader DC. To download and install Acrobat Reader DC for free, visit the Adobe Acrobat Reader DC webpage.)
Working with Dynamic PDF Forms
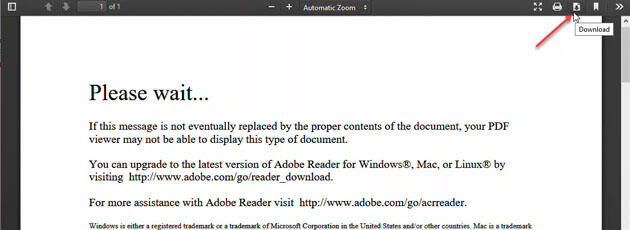
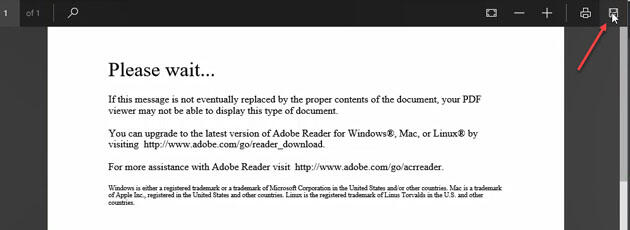
When you download a PDF form, the default settings of your web browser may cause the PDF file to automatically open in the browser rather than in Adobe Reader. Most browsers have proprietary PDF viewers that are not compatible with the advanced features of the interactive annual evaluation PDF forms, and you may encounter the following message:
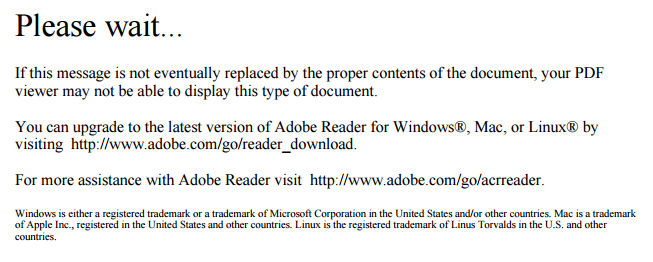
If you see the above message, use the menu in the browser window to save the file to your computer and then open it with Adobe Reader.
Steps to download the PDF file from the website and save it to your computer:
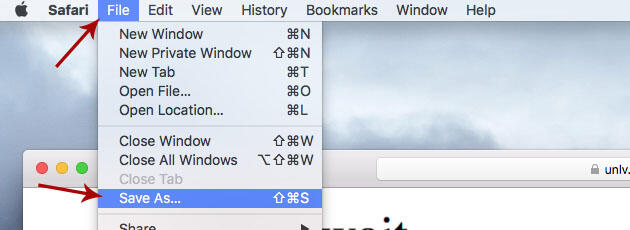
In your web browser, click on the icon to download the PDF file and follow the prompts to save it to your desired location on your computer.
Google Chrome

Mozilla Firefox
Microsoft Edge
Apple Safari
Note: Depending on your browser settings, the PDF may automatically download to your computer when you click on it. In that case, follow one of the methods below to open the file.
Steps to open the downloaded PDF file in Adobe Reader:
Once you have downloaded the file to your computer, you can open it from Adobe Reader OR by choosing the file on your computer.
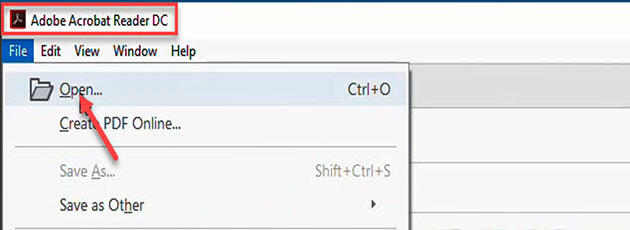
- To open from Adobe Reader:
Launch Adobe Reader and then choose File, then Open, and follow the prompts to navigate to the file location and open the file.
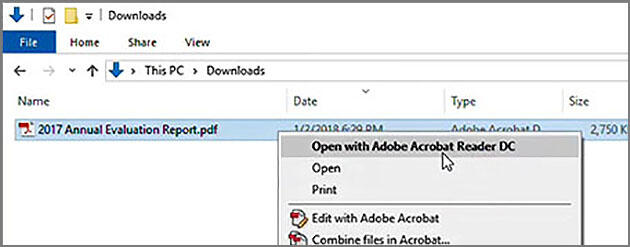
- To open from Windows Explorer (PC):
Find the file on your computer, right-click on the file, and choose Open with Adobe Acrobat Reader.
- To open from Finder (Mac)
Find the file on your computer, right-click (or control+click) on the file, choose Open With, and then choose Adobe Acrobat Reader.

Note: Double-clicking on the file may launch a different PDF viewer, depending on the settings on your computer. Using the method above for either Windows or Mac will ensure that the PDF file opens in the correct application.
Working with Adobe Digital IDs
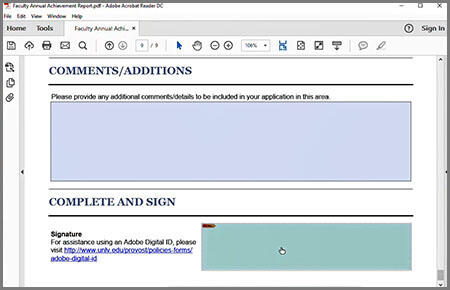
Forms such as the Faculty Annual Achievement Report, the Faculty Annual Evaluation Report, and the Outside Activity Request Form all require electronic signatures using Adobe Digital ID. Note that insertion of an Adobe digital signature into the Faculty Annual Evaluation Report causes portions of the document to be locked from further editing. Therefore, please do not sign the document until it is complete and no further changes will be made.
The easiest way to create a digital ID is to do it directly in the PDF form when it is already open in Adobe Reader. To download and install the latest version of Acrobat Reader for free, visit get.adobe.com/reader.
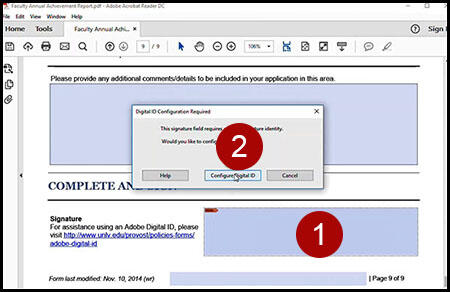
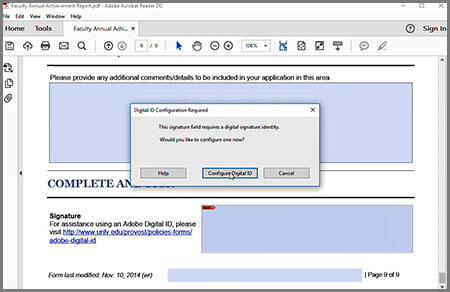
- When you are finished filling out the document and are confident that no further edits need to be made, navigate to the Signature field, which is indicated by a small red flag. Click in that field.
- In the pop-up window, click on Configure Digital ID.
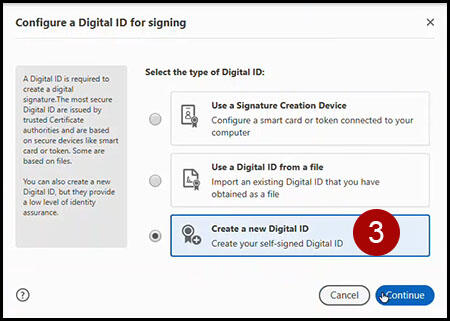
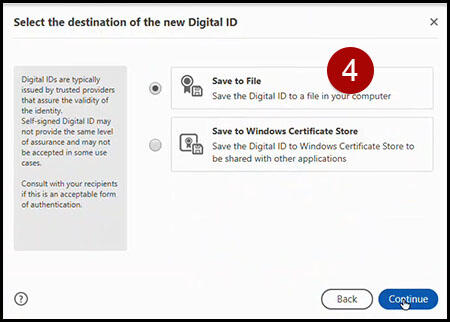
- Choose Create a new Digital ID, and then click on Continue.
- Choose Save to File, and then click on Continue.
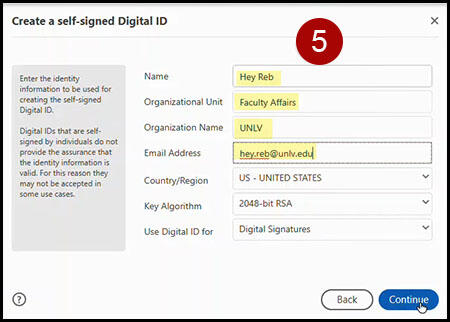
- Enter your first and last name in the Name field, your department or unit in the Organizational Unit field, “UNLV” in the Organization Name field, and your UNLV email address in the Email Address field.
Leave the bottom three fields as they appear, and then click on Continue.
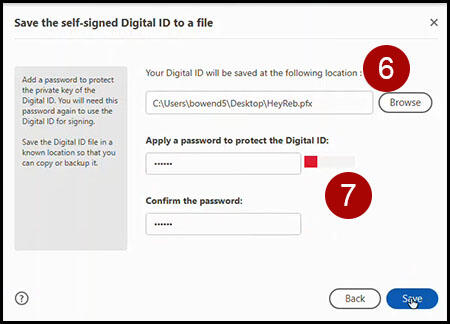
- Click on Browse to provide the location where you want to store your digital ID. You can leave the default location if you plan to use this computer for filling out your PDF forms. If you plan to use other computers, you may want to store your ID on a flash drive to take with you. Wherever you decide to store your ID, make a note of that location.
- Create a password that you will remember. You will need it every time you use your digital ID. Click on Save.
- Make sure your new Digital ID is selected, and then click on Continue.
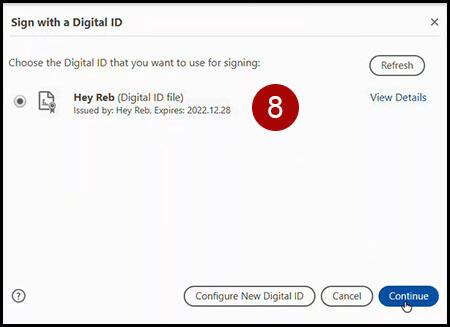
- Enter the password you used to create your digital ID, and then click on Sign.

- After the digital ID displays in the signature field of the PDF file, save it to your computer. When you close and open the file, it will retain the digital signature. You may now email or send the file through other electronic means, as needed.
Additional Resources
You can also create a digital ID ahead of time in Adobe Reader without opening a form. For that option, see this short video tutorial.
If you have already created a digital ID, you can use it to digitally sign PDF forms that require an electronic signature. When you are ready to sign the document, simply follow the prompts to navigate to the location where you have stored your digital ID. Be prepared to enter the password you selected when you first created your ID.
For digital IDs that you have stored on your computer:
- Navigate to the Signature field (usually indicated by a small red flag). Click in that field.
- A window will pop up with a list of IDs on your computer. Choose the ID you want to use and click on Continue.

- On the signature page, enter the password you selected when you created that ID. Click on Sign.

- After the digital ID displays in the signature field of the PDF file, save it to your computer. When you close and open the file, it will retain the digital signature. You may now email or send the file through other electronic means, as needed.
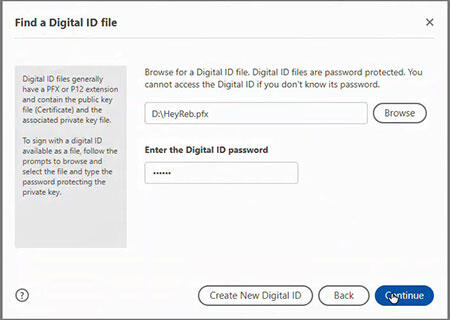
For digital IDs that you have stored externally:
- Navigate to the Signature field (usually indicated by a small red flag). Click in that field.

- A window will pop up. Choose Configure Digital ID.
- Choose Use a Digital ID from a file. Click on Continue.

- Navigate to the location where your digital ID is stored by clicking on Browse. In this example, the ID is stored on a flash drive.
After you have chosen the file (it will have a .pfx file extension), enter the password you selected when you created that ID. Click on Continue.
- The current ID will now be added to the list of IDs you can use for digital signing. Click on Continue.

- Make sure the radio button next to the ID is chosen. Click on Continue.

- On the signature page, again enter the password you selected when you created that ID. Click on Sign.

- After the digital ID displays in the signature field of the PDF file, save it to your computer. When you close and open the file, it will retain the digital signature. You may now email or send the file through other electronic means, as needed.
Additional Resources
- View video tutorials:
Troubleshooting
Below are common issues that you may encounter while completing a dynamic PDF form or applying your digital signature.
If you have forgotten your password, it cannot be emailed to you or reset; you will have to create a new ID. Follow the instructions above for creating a digital ID.
Many dynamic PDF forms at UNLV contain multiple signature fields. When more than one signature is applied, the following warning message may display at the top of the form:

A form with this message is not corrupted or infected with a virus. Signatures can still be added to the document, and the signed form can be saved as usual.
JavaScript is needed for digital signatures and other interactive features of dynamic PDF forms to work properly. If JavaScript is disabled, the following warning message may be displayed: “JavaScript is currently disabled and this document uses it for some features. Enabling JavaScript can lead to potential security issues.”
JavaScript can be enabled for the current PDF form by clicking on the Options button and selecting the option to “Enable JavaScript for this document always.” This will resolve the issue for the current file only, and another interactive form that displays the message will need to have JavaScript enabled in a similar manner.
To enable JavaScript for all PDF forms, settings in Adobe Reader may be permanently configured using the following steps:
- Click on the Edit menu at the top left hand side of the application.
- Select Preferences.
- Under the Categories menu, click on JavaScript.
- Under JavaScript, check the box to Enable Acrobat JavaScript, and click on Okay.
- Close out of Adobe Reader and restart the application.
- The JavaScript warning message should no longer display on future interactive PDF forms that are opened in Adobe Reader.
Some dynamic PDF forms at UNLV (e.g., the Faculty Annual Evaluation Report) are designed to lock certain sections and protect them from further editing after a digital signature has been applied. A locked form can be unlocked by removing the associated digital signature.
If changes must be made to a locked form but it cannot be unlocked due to problems removing the digital signature that locked it (see section below), the best solution is to copy the text into a blank form, make the necessary changes, and sign the new form.
An Adobe digital signature can be removed from a PDF form by right-clicking on it and selecting the option to Clear Signature, if Adobe Reader is able to locate the digital ID file (with extension .pfx) originally used to create the signature (e.g., if the ID file is loaded on the computer or is accessible on a flash drive). However, if Adobe Reader cannot find the ID file from which the signature was generated, the digital signature cannot be removed from the form.
If you are unable to resolve your problem with completing or digitally signing your dynamic PDF form using the guidance provided above, please use the following form to request further assistance.